Want to find out whether the Mobile HomeCage fits into your experimental set-up? In this guide to compatibility, we provide the instructions for taking the microscope measurements, selecting a stage, and an air source. If you don’t want to measure the microscope yourself, tell us the maker and the model. Ideally, also send us a front and side picture of your setup with a ruler.
If you are measuring the microscope yourself, watch the video below and read the instructions on taking the measurements.
The Mobile HomeCage models
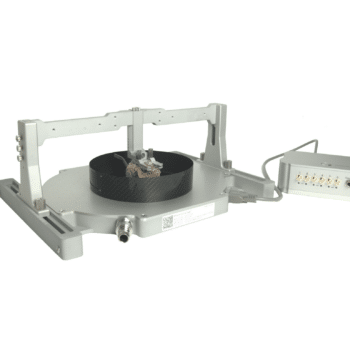
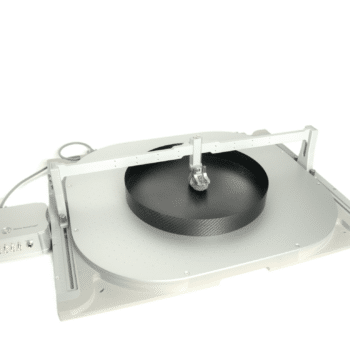
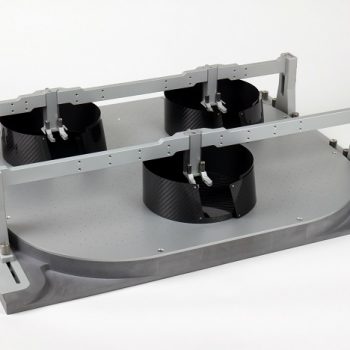
Let’s recapitulate some basic facts about the Mobile HomeCage. It comes in two sizes: the standard size Mobile HomeCage is compact and compatible with the majority of commercial 2-photon microscopes. The Mobile HomeCage Large allows combining imaging with behavioral readouts. For this reason, the floating cage has a larger diameter (325 mm compared to 180 mm in the standard-size Mobile HomeCage). The frame is also larger: it requires more space in the imaging setup. Both systems can be equipped with locomotion tracking components. Luckily, the sensor board used for tracking is built into the air dispenser. It does not require additional space in the setup. Whether you are using the system with or without locomotion tracking, it takes up the same space.
Measuring the microscope for compatibility
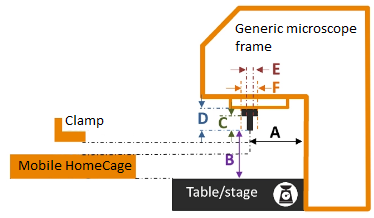
The picture on the left is a symbolic representation of a microscope frame.
Letters A through F stand for critical dimensions. Pay special attention to the first three measurements.
Compatibility table
The table below explains what the critical dimensions are, what their values must be, and what to do if your measurements do not match the given values. The values are given for the default configuration with the standard rotating clamp:
| Dimensions | Mobile HomeCage | Mobile HomeCage Large | Possible fixes |
|---|---|---|---|
| A. Distance from the objective's focal point to the microscope frame must be | >122 mm | >272 mm | Mobile HomeCage: use an elongated clamp (min distance with elongated clamp 102 mm); Mobile HomeCage Large: use a smaller cage diameter (ask us about customization) |
| B. Distance from the objective's focal point (objective retracted) to the table / stage surface must be | >70 mm | >84 mm | Lower the stage (to increase the distance); lift the stage or use a riser block (to decrease the distance) |
| C. Objective's parfocal length must be | >40 mm | >40 mm | Use a parfocal length extender to increase the objective's length or use a low-wall cage with a short neck |
| D. Objective's length with holder / slider must be | >56 mm | >56 mm | Use a short neck and a low-wall cage |
| E. Objective's diameter | Must be considered in conjunction with the working distance - contact us | Under ceratain conditions and with certain changes to the standard configuration, it is possible to use up to 100 mm diameter objectives. | |
| F. Objective's holder diameter must be | <80 mm | <80 mm | Use an elongated clamp |
The Mobile HomeCage® Large is compatible with these commercial two-photon microscopes:
- without modifications: Scientifica’s HyperScope (VivoScope frame with TOM), Neurolabware, Nikon’s A1R and AX R (on the gate stands), Sutter MOM, Femtonics’ FemtoSmart (with the Bridge structure), Olympus FVMPE-RS (gantry frame with InnerFocus); Thorlabs’ Bergamo II (recent development, info may not have spread internally but we can connect you to the right people); Bruker’s (resurrected) Ultima 2P Plus Extended Reach model is also fully compatible (we use it at Neurotar) – unfortunately there is no info available on the web about the Extended Reach frame – ask Bruker directly or ask our team who to contact at Bruker;
- with some modifications: Bruker’s Ultima Investigator and 2P Plus models (smaller diameter cages), Femtonics’ Femto3D Atlas (parfocal objective length extension, several standard parts’ replacement), Thorlabs’ DIY 2-photon (smaller diameter cages);
- Finally, it is possible to use the Mobile HomeCage Large system with most commercial microscopes by adding a periscopic extension, such as the InverterScope available from LSM Tech.
Selecting a stage
Make sure that the stage can carry the weight of your Mobile HomeCage device. The stage surface can be slightly smaller than the size of the air dispenser. Check the table below for the unpackaged weights and air dispenser sizes (length X width) of the Mobile HomeCage systems:
| Type of device | Unpackaged weight (kg) | Air dispenser dimensions (mm) |
|---|---|---|
| Mobile HomeCage | 6.1 | 420 X 300 |
| Mobile HomeCage with tracking capability | 6.8 | 420 X 300 |
| Mobile HomeCage Large | 11.5 | 720 X 570 |
| Mobile HomeCage Large with tracking capability | 13 | 720 X 570 |
| MultiCage Training Arena | 11.5 | 720 X 570 |
Sample stages for the Mobile HomeCage systems
- Prior motorized XY stepper stage (carries up to 100 kg; top plate 300 mm X 300 mm). Contact us for an offer.
- Prior heady-duty translation stage (carries up to 100 kg, top plate 600 mm X 600 mm, low vertical profile) – this stage is optimal for integrating the Mobile HomeCage Large into imaging setups equipped with periscopic objective extensions such as the InnerFocus (Evident Scientific, formerly Olympus) or InverterScope (LSM-Tech). HT11300KT-NL (not yet shown on the Prior website – contact us for more information).
- Prior ZDeck: motorized or manual (carries up to 25 kg)
- ThorLabs’ PMP-2XY/M translational stage (motorized stage carries 34 kg)
- Scientifica’s Motorised Movable Base Plate (MMBP) (stage carries 35 kg)
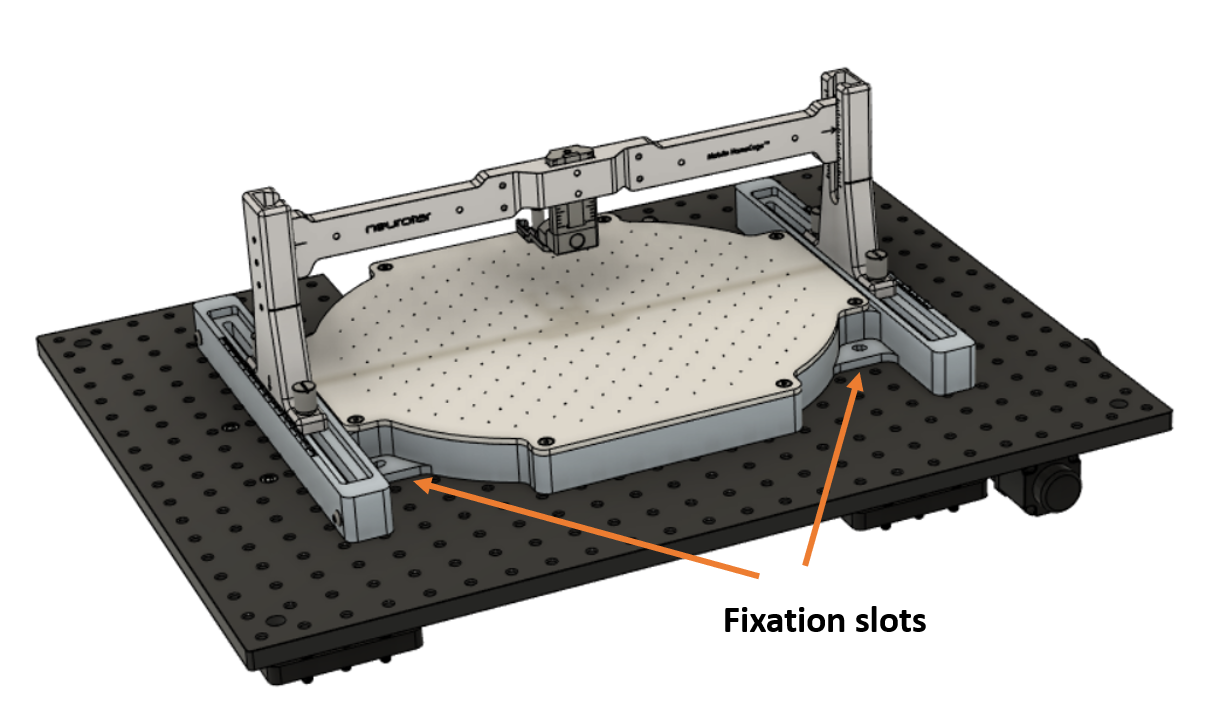
Use four fixation slots (compatible with metric and imperial breadboards) to secure the Mobile HomeCage to the stage. Alternatively, use Neurotar’s fixation kit (not included with the Mobile HomeCage system).

The surface of the air dispenser of the Mobile HomeCage Large exceeds the surface of most stages (see the picture on the left: Mobile HomeCage Large on Thorlabs’ stage). Secure the air dispenser to the stage using two out of four fixation slots.
If you frequently move the standard-size Mobile HomeCage in and out of the imaging setup, we recommend using the fixation kit for quickly fixing and securing the Mobile HomeCage in the exact same spot on the XY stage.
Selecting an air source
Finally, you would need a high flow – low-pressure air source to operate your Mobile HomeCage device. The table below provides airflow requirements for different types of Mobile HomeCage systems:
| Type of device | Air source specifications |
|---|---|
| Mobile HomeCage | 120 L/min at 20 kPa |
| Mobile HomeCage with tracking capability | 120 L/min at 20 kPa |
| Mobile HomeCage Large | 150 L/min at 20 kPa |
| Mobile HomeCage Large with tracking capability | 150 L/min at 20 kPa |
| MultiCage Training Arena | 250 L/min at 20 kPa |
Most labs use their local laboratory air lines, but some require commercial air pumps. Any pump operating at or above the above specifications would work. We recommend using industrial air pumps, although many cost-efficient aquarium pumps work quite well and some are available on Amazon. Unfortunately, most aquarium pumps don’t allow adjusting the airflow. If this is the case, we recommend purchasing an airflow regulator. Watch this short video as an introduction to alternative air solutions and contact us for specific air pump recommendations since they differ by geographic location:
The air source that you use for the Mobile HomeCage or the Mobile HomeCage Large does not work with the MultiCage? There is a simple and low-cost fix that allows using the Multicage with the airflow below the specified 250 L/min. Download the DIY instructions below:
We do not recommend using compressed air tanks as an air source for the Mobile HomeCage: due to high pressure, they run out of air very quickly.
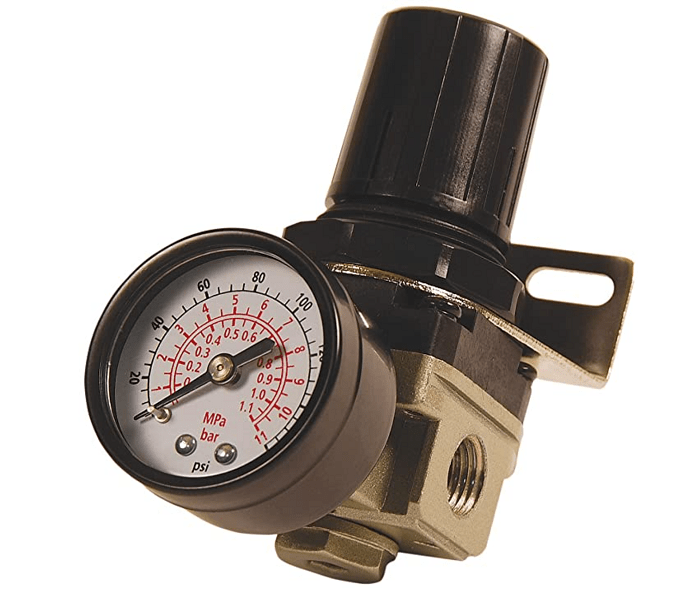
We recommend adding an air pressure regulator to your air line for regulating and maintaining constant air pressure. A simple model like the one shown on the right is sufficient, but you may also opt for a slightly more expensive model with moisture and debris filters (a large variety is available on Amazon). Do not use the air pressure regulator with aquarium pumps as it may increase the resistance and require additional airflow. Increasing airflow may also increase the noise.
Most noise in the system is generated by the air source and air connectors. To reduce the noise, increase the distance between the Mobile HomeCage device and the air source. This requires using a longer hose and increasing the airflow. Alternatively, build a box around the air source.